استكشف أسرار الطبيعة والحياة البرية
أهلاً بكم في مجلة لبؤة الإلكترونية. نأخذكم في رحلة مشوقة لاستكشاف عجائب الكوكب، سلوكيات الحيوانات، وجمال الغابات والصحاري بأسلوب علمي شائق ومبسط.
تصفح كل المقالاتأحدث المقالات
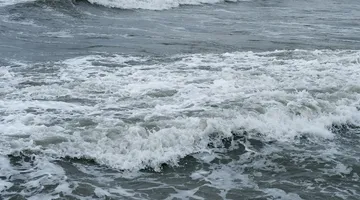
ظاهرة النينيو: كيف يغير احترار المحيطات المناخ العالمي؟
استكشف ظاهرة النينيو المناخية، وتعرف على أسباب حدوثها في المحيط الهادئ، وكيف تؤدي دورة احترار المياه هذه إلى إحداث تقلبات طقس متطرفة حول العالم.
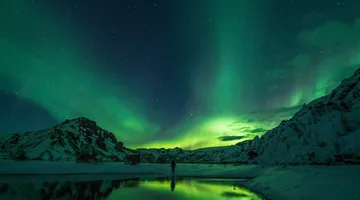
ظاهرة الشفق القطبي: كيف ترسم الرياح الشمسية لوحات مضيئة في السماء؟
اكتشف الفيزياء المذهلة خلف ظاهرة الشفق القطبي (الأضواء الشمالية)، وتعرف على دور الرياح الشمسية والمجال المغناطيسي للأرض في رسم ألوان السماء.
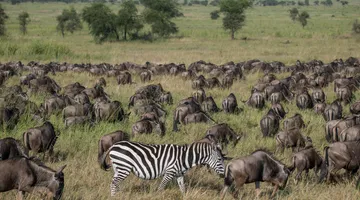
ظاهرة الهجرة الكبرى في أفريقيا: ملايين الحيوانات في رحلة البحث عن العشب
استكشف تفاصيل ظاهرة الهجرة الكبرى في أفريقيا، حيث تخوض ملايين حيوانات النو والحمر الوحشية رحلة سنوية محفوفة بالمخاطر بين السيرينغيتي وماساي مارا.
أقسام المجلة
عالم الحيوان
أسرار الحيوانات المفترسة والأليفة، سلوكيات البقاء والغرائز المدهشة التي تحكم الحياة الفطرية في الغابات والبحار.
اقرأ المزيدالبيئة والطبيعة
تقارير ومقالات حول الحفاظ على البيئة، استكشاف الغابات، التغير المناخي، والجمال الطبيعي الخلاب الذي يزخر به كوكبنا.
اقرأ المزيد